Chain link fences earn their keep quietly. They keep pets in, strangers out, and balls from flying into the neighbor’s roses. They weather every season, shrug off a lot of abuse, and usually look fine with minimal attention. Still, the same things that make them tough also hide problems until they’ve grown. I’ve walked more properties than I can count and seen the same avoidable failures again and again: posts set too shallow, bottom rails left unsupported on a slope, gates that never latched properly and sagged from day one, and tension wire forgotten like an optional accessory. With a little routine care, plus a few targeted fixes, you can stretch decades out of a basic steel fabric fence.
Whether you installed it yourself, hired a chain link fence contractor, or inherited it with the house, the following guidance will help you keep it solid and safe. I’ll cover quick checks, simple repairs, when to call a chain link fence company, and a handful of tricks that separate a serviceable fence from one you don’t think about for the next ten years.
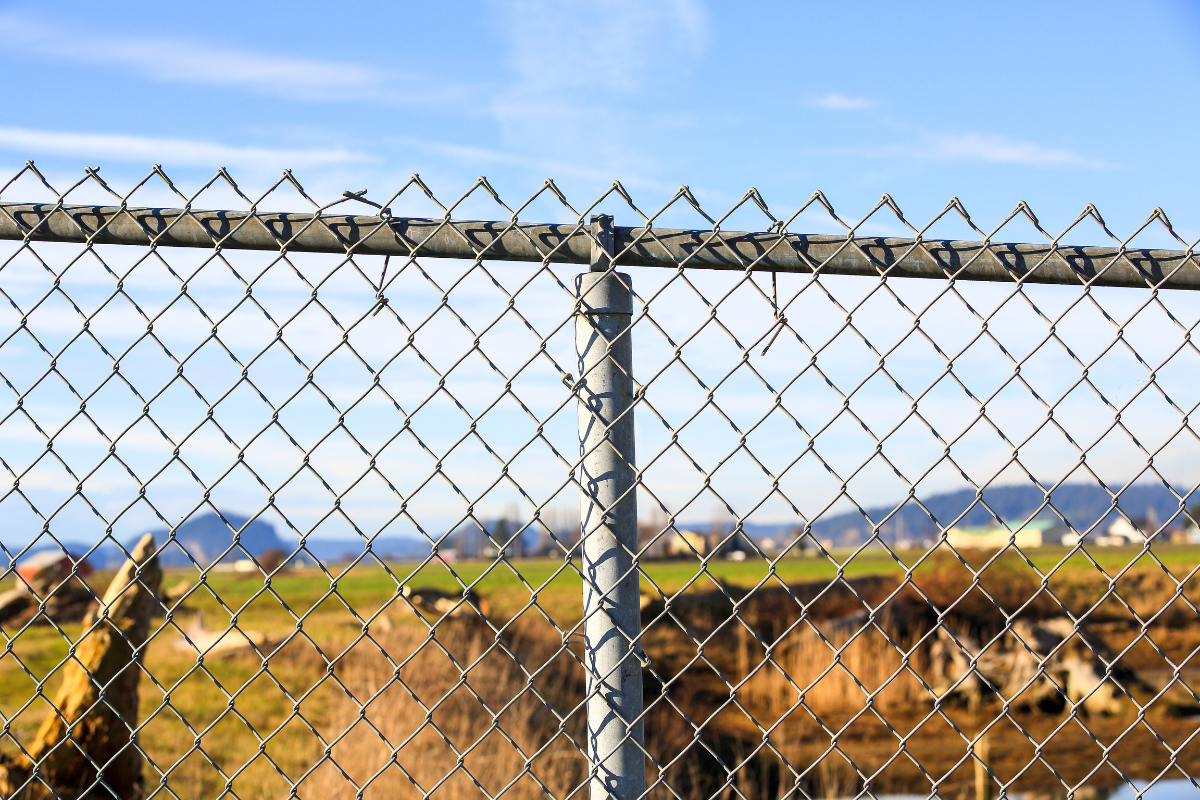
What fails first and why it matters
Every fence has a weak link, and with chain link fencing it’s rarely the woven fabric. The fabric stretches and relaxes with temperature and wind, and it can be re-tensioned. The real culprits are moisture and movement. Moisture attacks terminals and post bases, especially where soil traps water against galvanized steel. Movement comes from wind load, kids climbing, dogs charging the same spot every day, vehicles bumping gates, and frost heave lifting posts over winter.
Once a post leans two or three degrees, tension escapes the fabric. The top rail starts to bow, the bottom edge gaps open, and the gate stops lining up with the latch. A small bend becomes a reliability issue. Left alone, you end up replacing whole sections instead of making a one-hour repair.
I look for three telltales on my first pass: rust at welds and fittings, slack fabric between line posts, and out-of-square gates. Those three signs predict most of the work ahead.
The 10‑minute monthly walk
If you remember nothing else, do this short walk once a month, twice if you have high wind exposure or big dogs. Bring a nut driver or socket set, a can of dry lubricant, and your eyes.
Start at a corner post and follow the line. Sight down the top rail to catch subtle bends or waves. Tug the fabric near each tie, listening for a crisp ping rather than a dull thud. Check that ties at the top rail are intact and spaced roughly every 12 to 18 inches, closer near corners and gates. Kneel and look at the bottom edge. If you see daylight where there shouldn’t be, the tension wire may be loose or missing. At gates, close them gently and see whether the latch meets the catch without lifting or shoving. Finish by scanning post bases for cracking concrete or soil washout.
Most of the time you’ll tighten a few nuts and add a tie or two. Those tiny touches prevent far more expensive problems later.
Rust control that actually works
Galvanized steel holds up, but coatings can fail at cut ends, welds, and threaded hardware. Vinyl-coated fabric adds color and corrosion resistance, though it can hide creeping rust underneath if you never look closely.
The fix is simple and not glamorous. Wire-brush any orange bloom until you see clean metal. Wipe the area dry, then hit it with a zinc-rich cold galvanizing compound. The zinc content matters. Look for products with at least 90 percent zinc in the dried film. If you prefer a cleaner finish, overlay with a matching enamel after the zinc cures. For vinyl-coated fabric with a nick, clip back loose vinyl, treat the metal with zinc, then seal with a vinyl repair paint that approximates the color. It won’t look perfect up close, but it will halt the rot.
At ground level, rust tells a story about water. If the soil cups against the post, backfill with compacted gravel so water drains away. Clear mulch one or two inches from posts; wet mulch pressed against steel is an avoidable mistake that eats posts from the outside in.
Tightening slack fabric without a full rebuild
Wavy fabric weakens the fence. The top rail shoulders more wind load, ties snap, and the whole span starts to chatter. You don’t need to tear out a section to fix this. You just need to re-tension and re-tie, working from a terminal post toward the next one.
Loosen the tension band bolts at the terminal post just enough to slip the tension bar upward. Don’t remove the bar unless you plan to add or subtract diamonds of fabric. Add a come‑along or ratchet strap between the fabric and the opposite terminal to pull the slack. Use a spreader bar if you have one to keep the pull even across several diamonds. When the fabric tightens to the point you can press a knuckle with your thumb and it springs back, retighten the tension bands evenly. Finish by inspecting and replacing broken ties with new aluminum or coated steel ties. Keep the spacing consistent. If wind is a factor on your site, err on the tighter end of tie spacing and use heavier gauge ties at corners.
On long runs past 100 feet, you may need to break the fabric and insert a coupler to reset tension without overloading one end. A chain link fence contractor will often plan for this by using mid‑span terminals during the original chain link fence installation. If yours lacks that, budget an extra hour to add a new terminal post or braced line post to split the span.
Dealing with leaning posts
A post that leans usually got set shallow, lost support on one side, or heaved during a freeze. The fix depends on how bad the lean is and what the post is doing.
For line posts that lean slightly, you can often correct them without pulling concrete. Remove ties and loosen the top rail sleeve. Use a jack and a 2x4 to nudge the post back plumb, then pack crushed stone around the base and tamp it in layers. Reconnect the top rail and re-tie the fabric under tension. This holds well when the underlying concrete is sound and the soil simply shifted.
For corner or gate posts, small leans create big problems. Gate posts carry bending loads every time the gate swings. If a corner or gate post leans more than a degree or two, plan on a real reset. Saw-cut around the old footing, dig out to below frost depth, and pour a new footing bell-shaped at the bottom for uplift resistance. Set the post plumb with temporary braces and let the concrete cure at least 24 hours, longer if temperatures are low. A good chain link fencing company will bell and roughen the sides of the footing to lock it in. When I set my own, I drop the post into a dry mix, add water in lifts, and rod the concrete to avoid voids. Backfill the top few inches with gravel so water doesn’t pool against the post.
If you’re reusing a post with surface rust near the ground, consider sleeving it or replacing it altogether. A new post is cheaper than revisiting the same hole twice.
Keeping gates that hang right
Gates fail in three main ways: the hinges were undersized, the frame lacked a brace, or the latch never aligned and got forced. You can see the pattern by looking at the diagonal members. A well-built single-swing gate has a diagonal brace running from the bottom hinge up to the latch side. That brace puts the frame in compression under load. If your gate’s diagonal goes the other direction, it will sag.
Hinge type matters more than you think. Strap hinges on wood work, but chain link needs fully adjustable bolt-through hinges or commercial barrel hinges for heavy gates. On residential swings up to four feet, threaded adjustable hinges let you raise or lower the gate in small increments. If your gate drags, try this first: loosen the bottom hinge nut, lift the gate slightly with a block of wood, tighten, then tweak the top hinge to square the gap. Latch alignment should be neutral. The gate should meet the latch without lifting, pushing, https://johnathanorox703.almoheet-travel.com/emergency-chain-link-fence-repair-services-available or bouncing off a stop.
For double-drive gates, the drop rod and receiver sleeve take a beating. Dirt and ice clog sleeves so the rod can’t seat. Flush the sleeve, drill weep holes if none exist, and if the ground is soft, set a small concrete pad where the rod lands. I like to set a steel sleeve into that pad so the rod has a positive stop. On wider openings beyond 12 feet, add a center stop that takes the closing load rather than relying on latch arms alone.
If the gate frame itself is racked, retrofit a turnbuckle cable kit. Anchor the cable from the bottom hinge side to the top latch side, then turn the buckle until the gate squares up. It isn’t as pretty as a welded diagonal, but it saves a frame without a torch.
Bottom edge security, pets, and wildlife
The bottom of the fence is where trouble starts. Dogs test it, rabbits dig beneath, and wind flaps fabric that hangs even an inch too high. Tension wire exists to solve this, yet I still walk properties where it was never installed.
If you have a slack bottom, install a 9‑gauge tension wire through the last row of diamonds about 2 to 3 inches above grade. Anchor it to terminal posts with brace bands and tension it evenly. The wire should pull the fabric into a clean line that follows the terrain without big gaps. On sloped yards, accept a consistent reveal rather than forcing it dead level. That reveal lets water drain and prevents low spots from trapping moisture against the steel.
For pets that dig, add a substrate deterrent rather than stacking rocks they can move. Options include a narrow concrete mow strip, a buried apron of welded wire fencing bent in an L and tied to the chain link, or steel landscape edging aligned with the fabric. A buried apron set 6 to 8 inches deep discourages most diggers without turning the yard into a trench. If you install an apron, tie it to the bottom tension wire and the fabric every foot so it acts as one piece.
Wind, privacy slats, and structural upgrades
Privacy slats change the equation. They turn your fence into a sail that transmits loads to posts and rails. If your chain link fence installation began as an open weave and you later added full-density slats, you may have noticed more movement on windy days. On exposed sites, add structure before slats. That means upgrading line posts to the next diameter or schedule, adding a mid‑rail, and tightening tie spacing.
If slats are already in and you’re seeing bowing, work the problem in layers. First, check that the fabric is tensioned correctly. Next, add wind braces at corners and gates, essentially diagonal supports that triangulate the frame. Finally, replace weak top rail splices with full-length sleeves or swaged rail that runs farther past each post. In my experience, these changes make a slatted fence behave like a lighter open fence in terms of deflection.
For heavy snow drifts, remove slats for winter or reduce density by staggering them. It takes time, but it’s cheaper than resetting a row of leaned posts come spring.
Hardware that pays for itself
There’s no faster path to disappointment than reusing stripped nuts and ovaled carriage bolts. A small kit of quality hardware saves hours over the life of the fence. Choose galvanized or stainless for wet environments. Favor brace bands with smooth edges that won’t cut ties. Keep extra rail-end cups, K‑braces for corners, and a handful of adjustable hinges in a labeled bin.
When installing ties, use the proper tie tool or pliers and wrap away from the yard, not into it, so nothing snags a sleeve or paw. At chain link fencing services shops, we often pre-bend ties for speed, but at home you can take an extra beat to align them cleanly. The little details prevent injury and torn clothing later.
Vegetation, edging, and soil contact
Plants and chain link make uneasy neighbors. Vines look charming for a season, then become a heavy wet blanket that traps debris. I’ve weighed vine-laden sections that carried several pounds per square foot after rain. If you want green, choose light climbers and prune them hard. Better yet, plant shrubs a foot or two off the fence and let them grow into a screen without loading the fabric.
Keep soil from climbing up the fence during landscaping projects. Raised beds and mulch berms push damp material against steel. Maintain a shallow trough or gravel strip along the fence line to break capillary action and let air circulate. For mowing, a narrow mow strip or pavers save ties and fabric from the trimmer.
When a patch beats a panel replacement
You can fix a single broken diamond without replacing a whole stretch. Use a piece of scrap fabric, cut a spiral wire, and spin out the broken segment. Spin in a new strand to stitch the gap. Align the knuckles so the pattern matches, then crimp ends to keep the strand from backing out. If multiple diamonds are mangled or the bend extends into a terminal, a panel replacement might be cleaner. With practice, a spiral splice is a 15‑minute task and nearly invisible.
Top rail kinks from a fallen branch are another judgment call. A shallow bend can be rotated to the underside and supported with two rail sleeves, one on each side of the bend, locking the line straight. A sharp kink compromises the rail entirely. Cut it out and replace the span with swaged or sleeved rail. Keep your cuts clean and deburr so sleeves seat fully.
Working on slopes and odd lots
Few yards are level. On a gentle slope, step the fence by incrementally dropping the rail at line posts, keeping fabric tension balanced. On steeper grades, racking the fabric to follow terrain works, but only within limits. Most standard 2 inch mesh can rack 12 to 18 inches per 10 feet before diamonds distort. Beyond that, step the posts or add shorter panels. If your existing fence was forced to rack too far, you’ll see elongated diamonds and loose ties. The best repair is to reset a few posts at new heights to create clean steps, then rehang fabric without distortion. It sounds like a big job, but shifting three posts can fix a 60‑foot run that never looked right.
For odd angles, avoid hacks. Use terminal posts at angle points greater than 20 degrees. Tie fabric to a tension bar at each leg rather than trying to bend a single panel around a corner. Corners and angles bear tension, and proper brace assemblies with a top rail, brace rail, and diagonal tension rod prevent future movement.
Safety moments that save injuries
Chain link fencing looks forgiving, but repairs bring sharp edges, tensioned components, and heavy gate frames into play. Gloves and eye protection aren’t overkill when you’re spinning out a spiral wire or cutting a rail with a recip saw. Use a second set of hands when rehanging gates. If you’re mixing concrete near pets, keep them away until it’s covered or cured.
If your fence borders a public sidewalk or driveway, cordon off the work area. A swinging top rail or an open hole is a hazard you’re responsible for, even for a quick afternoon fix.
Tools that earn a spot in the bin
A few purpose-built tools change your relationship with fence work. A fence puller or come‑along with a spreader bar tightens fabric evenly. A tie‑wire twisting tool speeds up clean, consistent ties. A post level that straps on frees your hands, and a digging bar makes short work of backfill compaction. Add a 4‑foot level, a line, and a set of nut drivers matched to your hardware. If you expect to do more than one repair a year, these pay back quickly.
Rental gear fills gaps. A two-man auger or a one-man hydraulic unit reduces the misery of digging new post holes. Plate compactors help when you rebuild base material along the fence line. Don’t hesitate to rent for a weekend instead of muscling through a job that needs the right machine.
When to call a pro
There’s pride in a clean DIY repair, but knowing when to bring in chain link fencing services saves both money and headaches. If you have multiple leaning terminals, gate frames that need welding, or an entire run where the posts were set shallow, a chain link fence contractor will rebuild with the correct footing sizes and bracing in less time than a determined homeowner. Professionals also carry specialty fittings you won’t find at big box stores, which matters when matching older hardware or odd diameters.
Insurance claims after vehicle hits, storm damage across long spans, or pool-code compliance upgrades are other cases where a chain link fence company is worth the call. They’ll document, pull permits if needed, and certify that latches, heights, and clearances meet local codes.
Cost sense: small parts, big returns
Most of the fixes in this article cost less than a few dozen dollars in parts. A can of cold galvanizing spray runs $10 to $20. A bag of ties is similar. A new rail sleeve costs a few dollars, a tension bar under $15. Concrete for a post footing might run $10 to $25 depending on size. Gates and terminals climb quickly, especially in larger diameters or higher security grades.
Budget also for your time. A tidy homeowner repair on a single sagging gate might take two hours the first time, one hour the next. Resetting a corner post is usually a half day including cure time, longer in cold weather. Professionals charge more than the parts cost because they bring speed, tools, and the confidence that the fix will outlast the season.
Regional realities and weather
Frost depth dictates how deep posts should sit. In cold climates, anything shallower than local frost depth invites heave. If your old fence sits at 18 inches where frost reaches 36, the best maintenance plan won’t overcome physics. Plan resets to proper depth. In coastal or industrial areas with salt exposure, expect galvanizing to wear faster. Wash the fence a couple of times a year and use higher-grade coatings and stainless hardware where you can justify the cost.
Wind maps matter. If your property sits on a ridge or open field, build and repair for gust loads. Heavier posts, tighter tie spacing, and bracing turn out cheaper than redoing a fence that failed in the first nor’easter after you added privacy slats.
A simple seasonal rhythm
Think of your chain link fencing like a small utility: it just needs periodic attention to work indefinitely. Spring is for damage assessment, rust treatment, and re-tensioning fabric that relaxed over winter. Summer is good for gate adjustments and vegetation control, since metal expands slightly and reveals misalignments. Fall is when you clear leaves and debris from the bottom edge, check slats, and verify that posts and sleeves will drain before freezes. If you remove slats for winter wind, stack and label them by panel so they go back fast in spring.
Quick reference: fast fixes that stick
- Tighten fabric by loosening terminal bands, pulling with a come‑along and spreader, then re-tie with consistent spacing. Stop rust early with wire brushing and zinc-rich compound, then topcoat for appearance. Correct minor post lean by re-plumbing and backfilling with compacted stone; reset gate and corner posts in new footings if movement returns. Square a sagging gate by adjusting hinges, adding a diagonal brace or cable, and aligning the latch neutrally. Secure the bottom with tension wire and, for diggers, a buried apron or short mow strip to deny leverage.
If you’re planning new work
Sometimes it’s smarter to redo a weak section than to babysit it for years. If you’re planning a new chain link fence installation or replacing a tired stretch, choose materials around your site conditions. Go up a size on posts and rails for long runs or slats. Specify schedule 40 posts in high-wind zones or heavy-use gates. Use terminal posts and braces at every corner and angle change. Set posts to proper depth with bell-shaped footings where frost or uplift is a concern. Install bottom tension wire from day one.
Finally, pick a chain link fence company that builds like they’ll own the fence in five years. Ask how they brace corners, what hardware grades they use, and how they handle slopes. Good answers sound practical and specific. That mindset on day one turns maintenance into a light touch rather than an annual project list.
A chain link fence doesn’t ask for much. Give it ten minutes a month, a few smart upgrades, and a careful eye at gates and posts. Do that, and the fence will do its part quietly, the way it was meant to, year after year.
Southern Prestige
Address: 120 Mardi Gras Rd, Carencro, LA 70520
Phone: (337) 322-4261
Website: https://www.southernprestigefence.com/